Overview
Connectors are the bridge between Vaultera Switch and various payment service providers. By activating a connector, you enable your application to process payments through that specific payment gateway.Steps to Activate a Connector
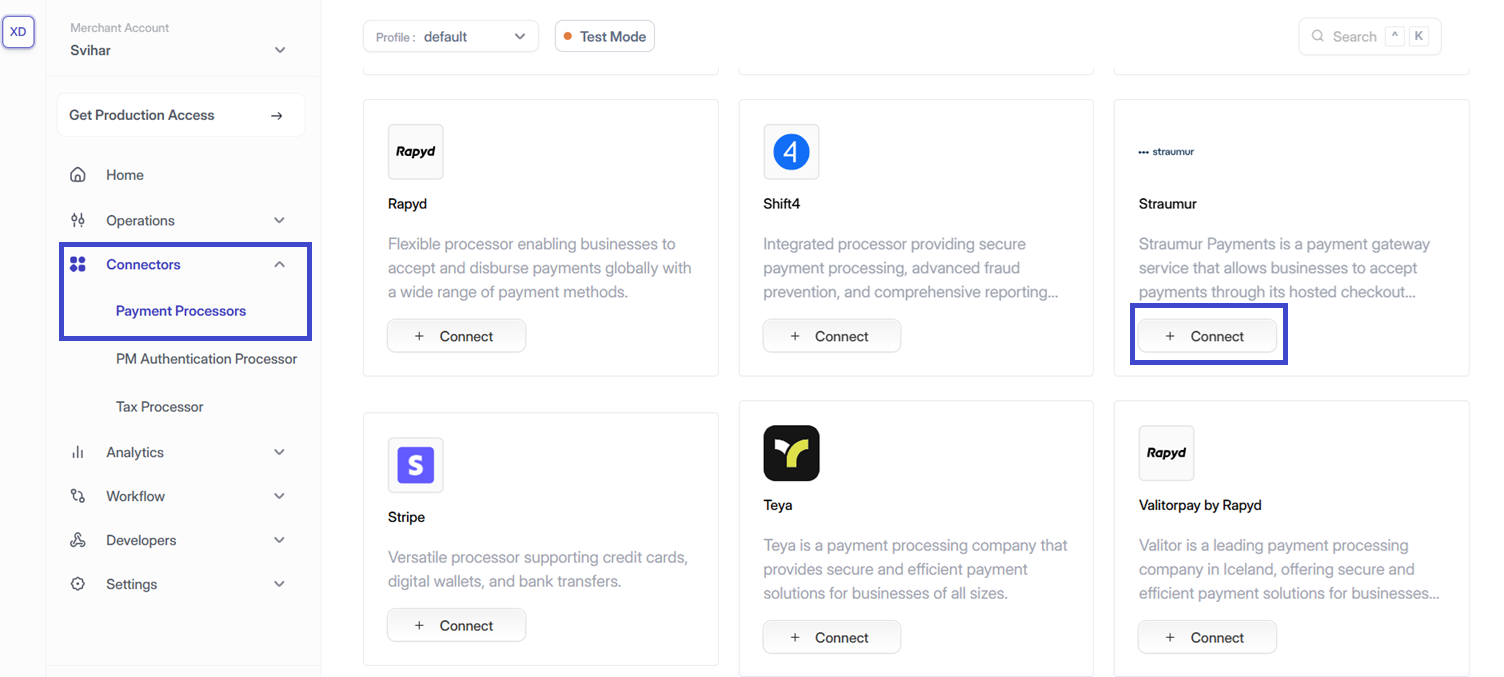
Step 1: Access the Connectors Section
- Navigate to the Connectors section in the Vaultera Switch Control Center
- Click the ’+ Connect’ button next to the connector you wish to activate
You can find the Connectors section in the main navigation menu of your Control Center dashboard.
Step 2: Profile Details
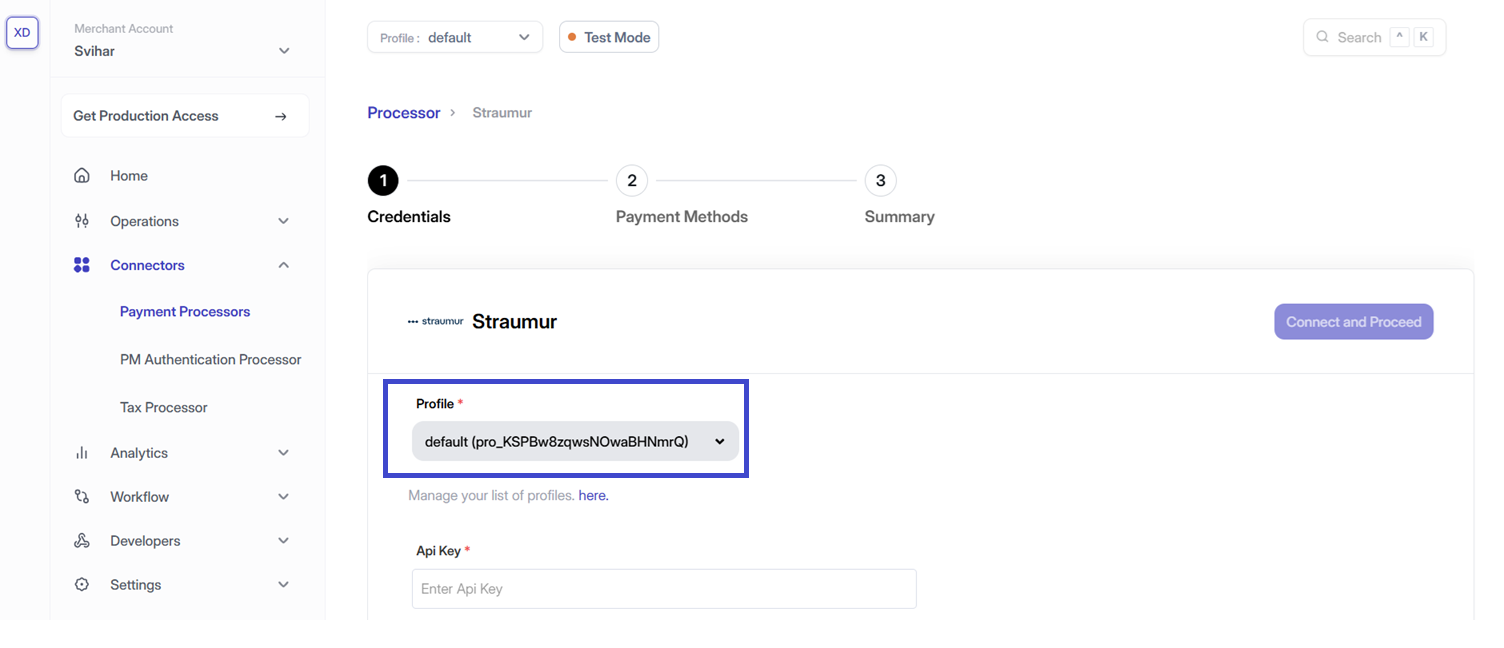
- The Profile ID is selected automatically in the Vaultera Switch Control Center
- To change it, use the dropdown in the top-right corner of the dashboard
Each profile can have different connector configurations. Make sure you’re working with the correct profile for your use case.
Step 3: Configure Connector Details
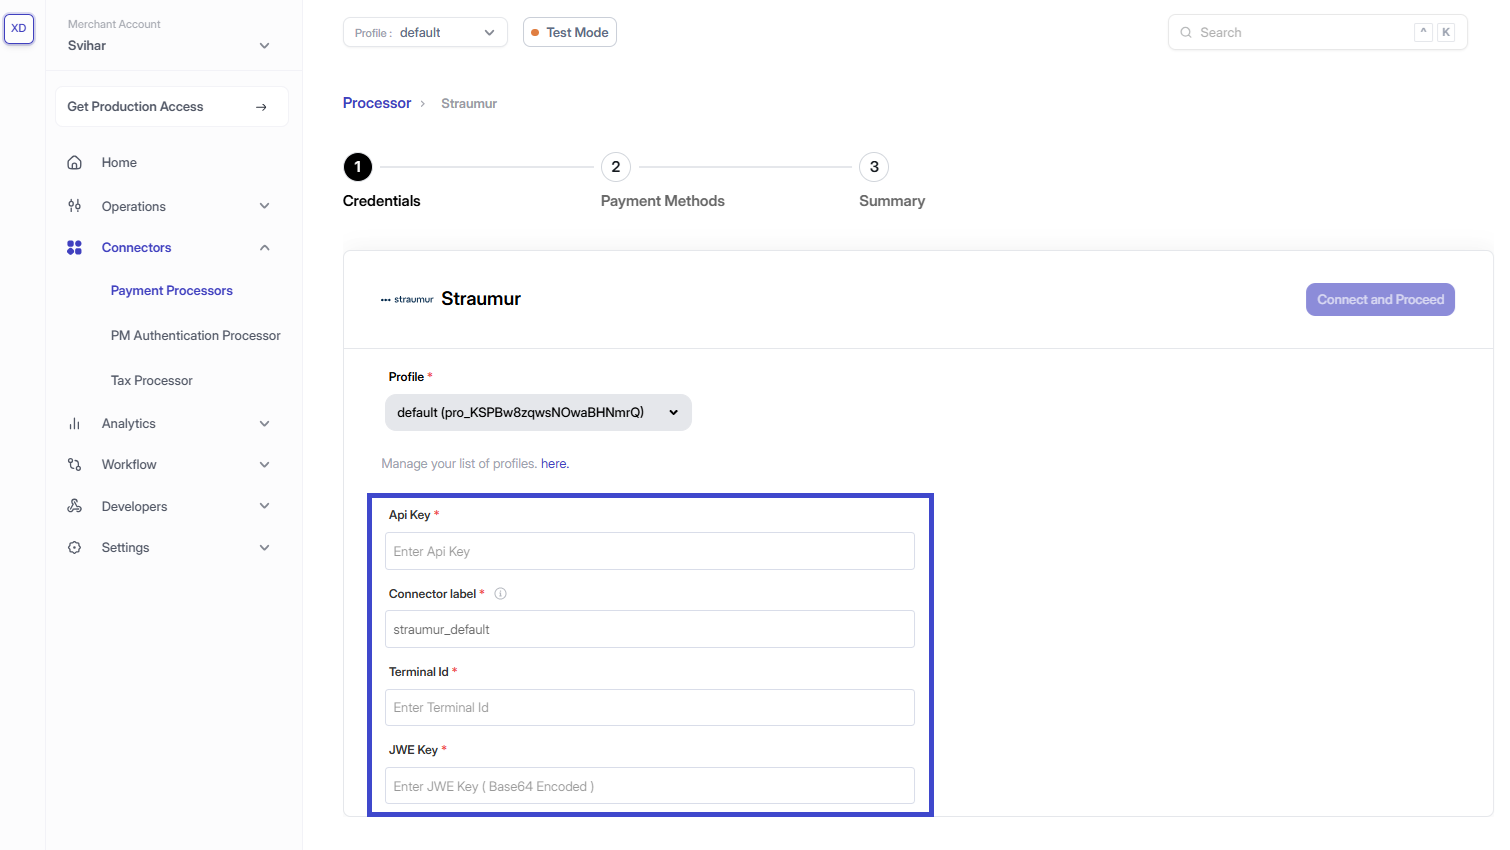
Enter the required credentials for the selected connector:- API Keys & Credentials: These can typically be found during sign-up or in your connector’s dashboard
- Connector Identifier: Define a unique identifier for the connector under your business profile
- Source Verification Key: If applicable, provide this to ensure webhook authenticity
Step 4: Enable Payment Methods
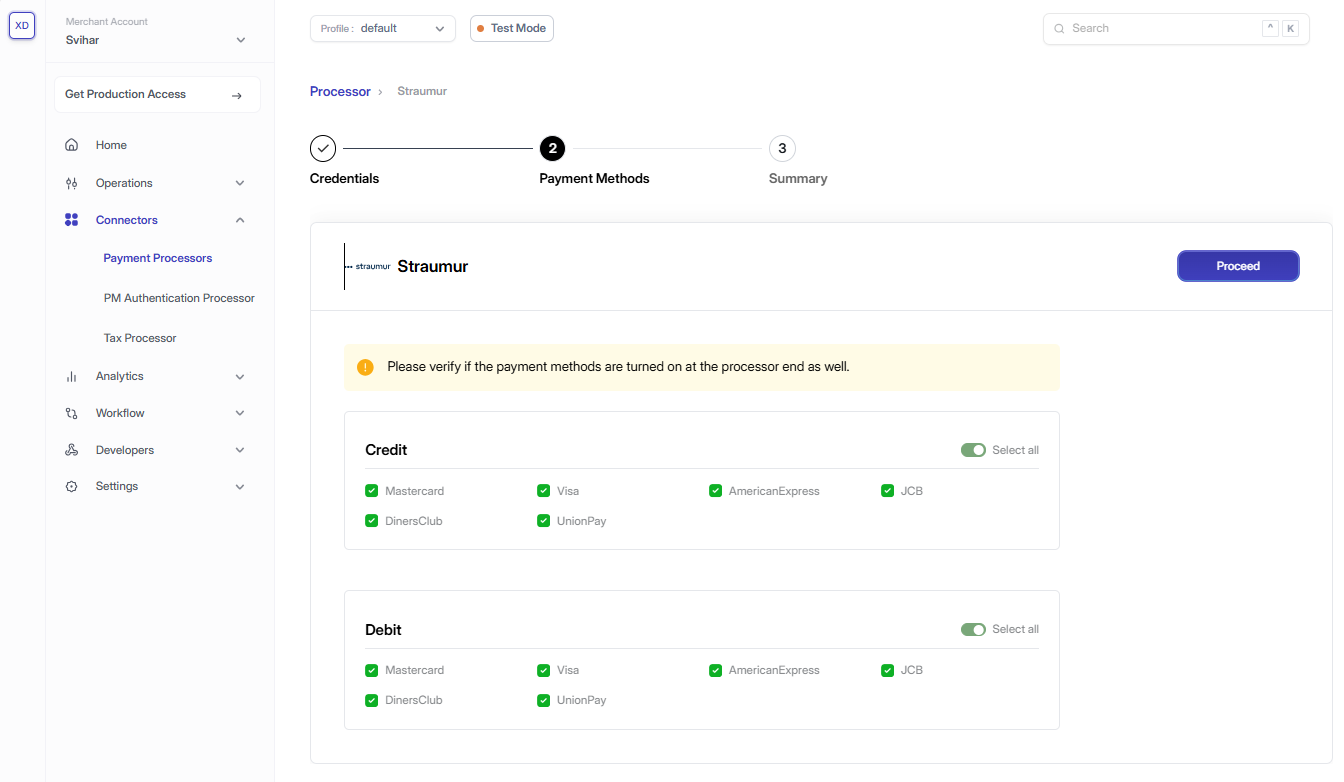
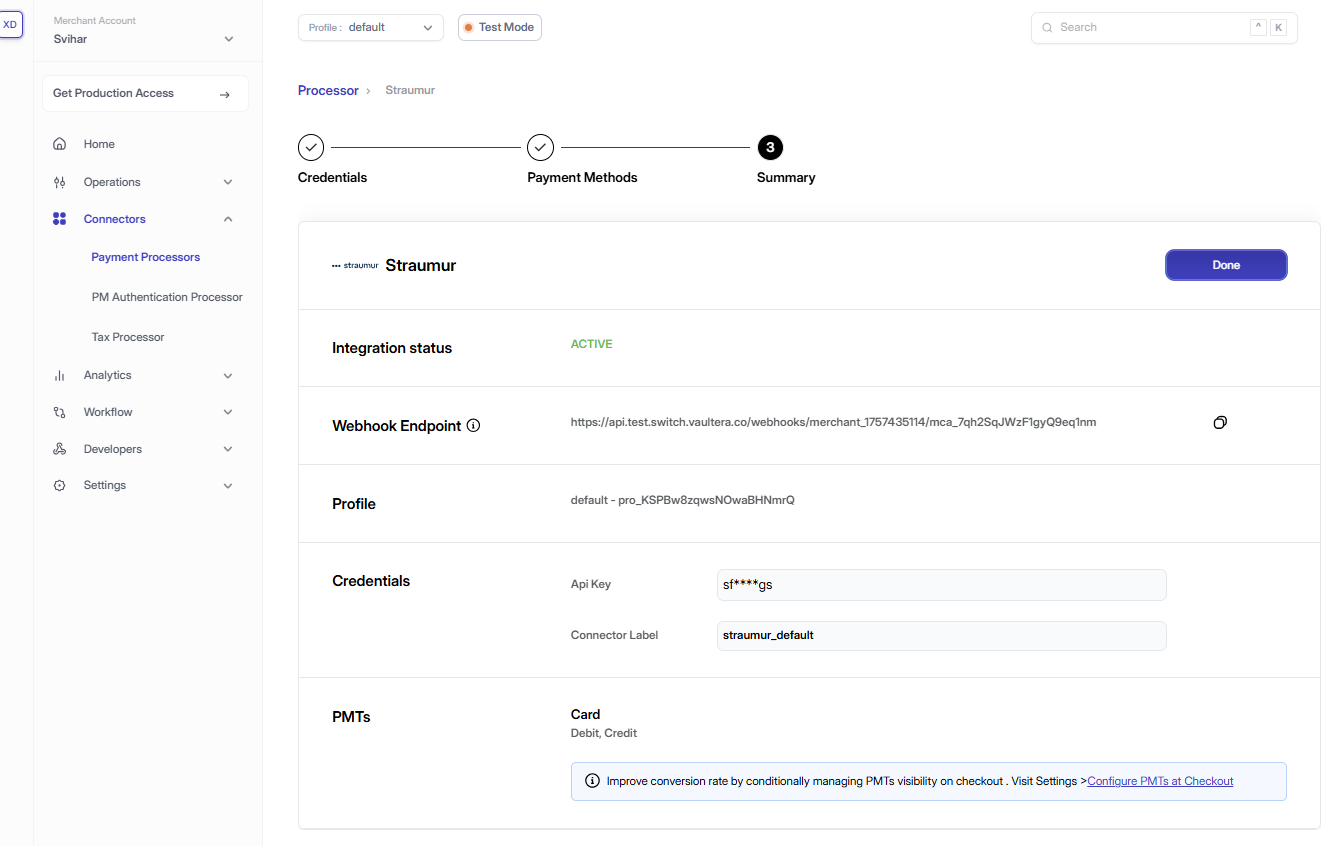
Select the payment methods that should be available during the demo checkout:- Credit/Debit Cards
- Digital Wallets
- Bank Transfers
- Alternative Payment Methods
Step 5: Configure Webhooks (Optional)
If your selected connector supports webhooks:- Copy the webhook URL from the Vaultera Switch Control Center
- Paste and configure it in your connector’s dashboard
- Test the webhook connection to ensure proper communication
Test Your Integration
Once the connector is set up, you can test it by initiating a demo payment:- Use the Test Payment feature in the Control Center
- Verify that payments are processed correctly
- Check that webhooks (if configured) are receiving updates
Edit Connector Credentials
To update connector credentials, you must re-enter all required credential fields.Steps to Update Credentials
Step 1: Access the Connectors Section
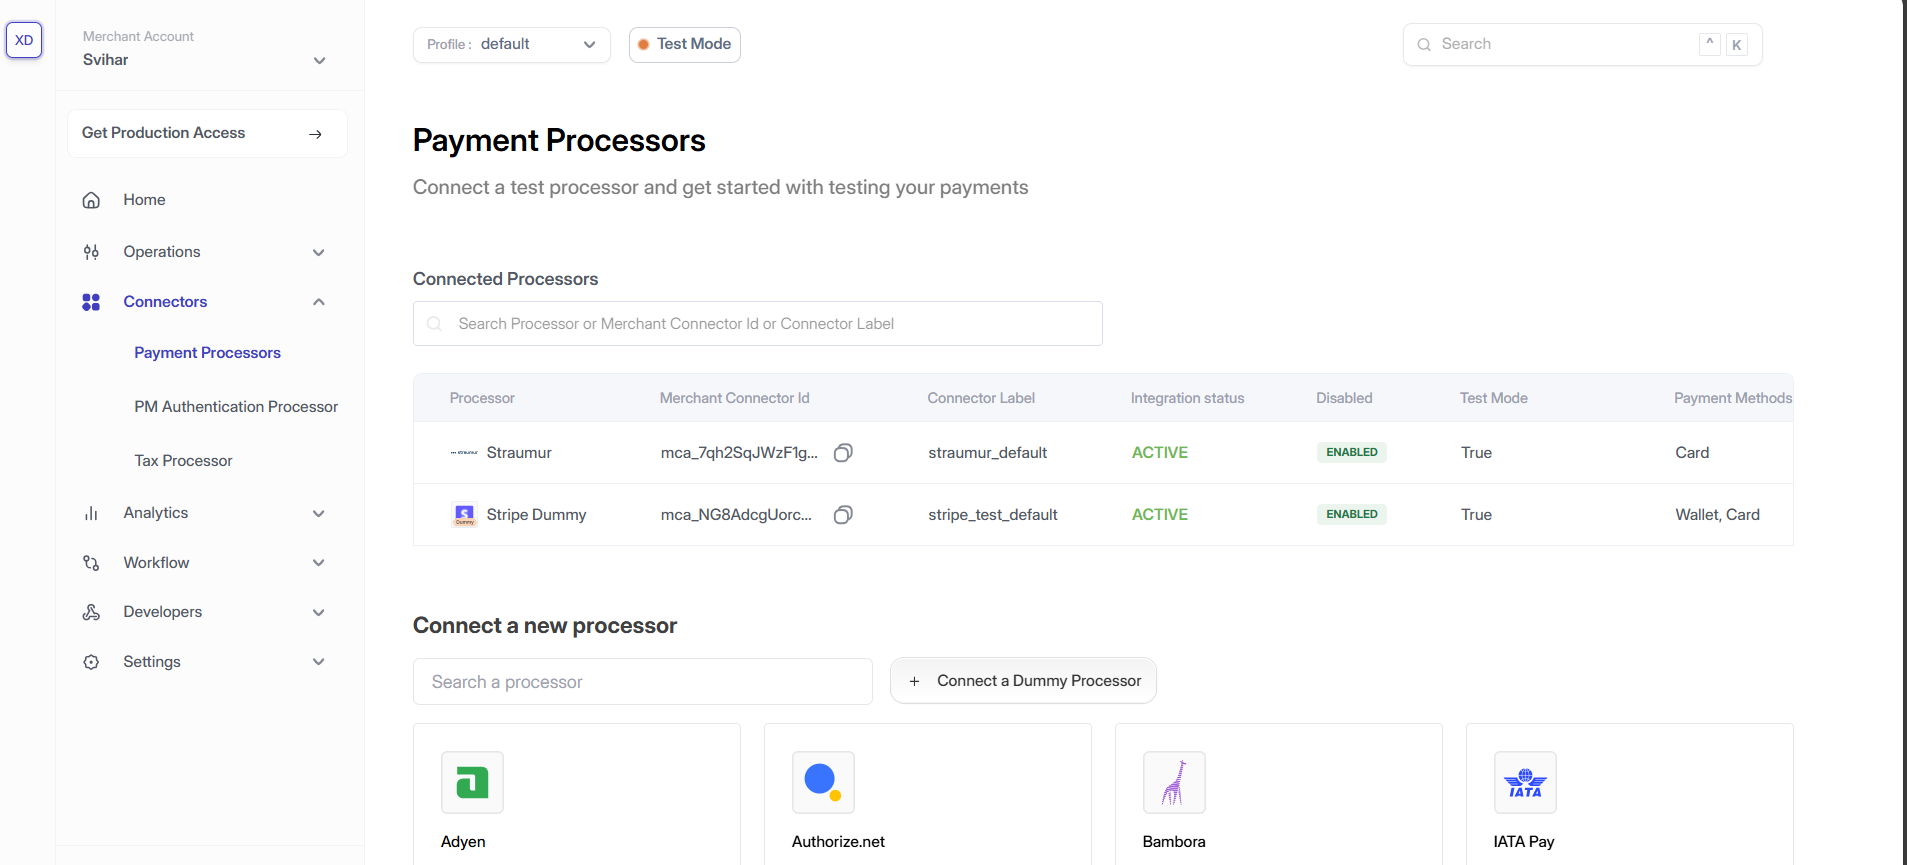
- Navigate to the Connectors section in the Control Center
- Here, you’ll see a list of all existing connector integrations for the selected profile
Step 2: Profile Details
- The Profile ID is auto-selected
- To Switch profiles, use the dropdown in the top-right corner of the dashboard
Step 3: Updating the Credentials
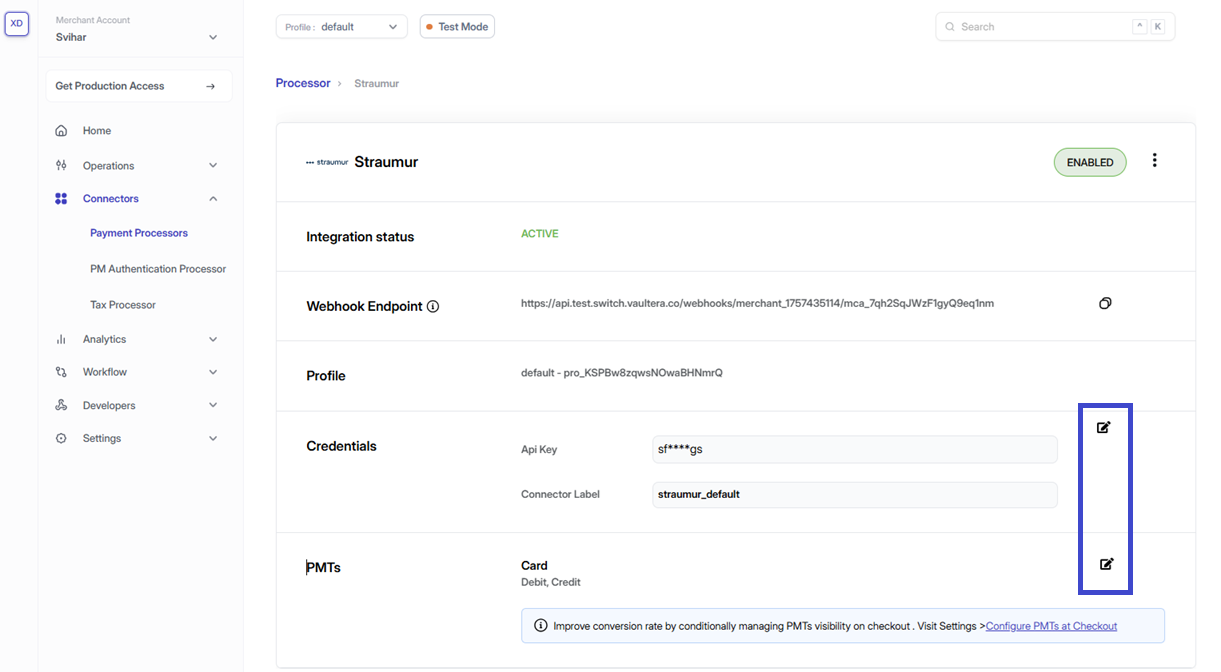
- Click the edit icon (📝) next to the connector’s API keys
- A pop-up will appear where you can re-enter and save the updated credentials
Best Practices
- Regular Updates: Keep your connector credentials up to date
- Testing: Always test your integration after making changes
- Monitoring: Monitor your connector’s performance and success rates
- Documentation: Keep track of your connector configurations for future reference
Need Help?
If you encounter any issues while setting up or managing your connectors:- Check the Connector Documentation
- Review the Troubleshooting Guide
- Contact our Support Team
Your connector is now ready to process payments! Start by creating your first payment intent and testing the complete flow.